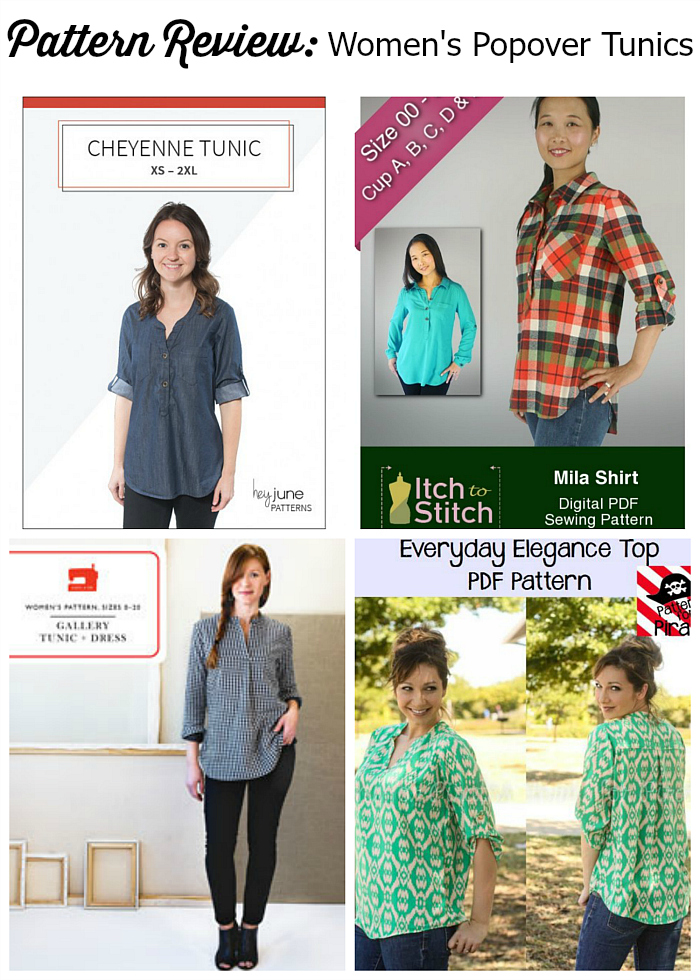
Now that I’ve got an expansive leggings wardrobe, I thought I’d make some tunics to go with them! Â While I like a good button down shirt, a popover tunic is even better in my opinion. Â There’s something about them that wraps up a button down and a tunic into a cute package, but a little more effortless than a shirt dress.
For my leggings comparison I did one big post because leggings are a much simpler garment. Â Since I’m investing a lot more time to muslin and sew four shirts I’m going to spread out the posts to give due attention to the details and process.
I already had the Hey June Cheyenne and Liesl + Co. Gallery Tunic, so I asked my braintrust the Capsule Wardrobe Sew Along group on Facebook to help round out a couple other comparable patterns to set up a four-way comparison.  We arrived at Itch to Stitch’s Mila and Patterns for Pirates Everyday Elegance.
There are a few other patterns out there that I considered like Cashmerette’s Harrison Shirt, but that has princess seams and doesn’t offer the half-placket popover option. Â Winter Wear Designs just released the Blithe Blouse and Dress which meets the criteria I’m reviewing, but I had already begun with these four when I learned of that one. Â I’ll consider an add-on perhaps down the road, but right now my dance card is full!
My current relevant measurements are: 5’8″ tall.  40″ upper bust, 42″ full bust, 36″ waist, 39″ high hip, 42″ full hip.  I’m kind of between a rectangle and an hourglass, but I lean more towards a rectangle because I don’t have a defined waist, particularly from the front.  I have broad shoulders and large trapezius muscles thanks to years of speed skating and Muay Thai.  I also have a swayback, but I don’t typically address this for tops.
I selected the size to sew based on the recommendation in the patterns, and made muslins for each to determine any fitting adjustments I needed to best fit my figure, which I’ll discuss below.
The fabrics I plan to use are all fairly similar in weight and drape.  Two are voile from Art Gallery, then a gingham and chambray from Robert Kaufman.  The voile I had enough yardage in my stash from Fabric.com, and I purchased the two Robert Kaufman fabrics from Raspberry Creek Fabrics for this challenge.  I’ll use the yardage as the backdrop for each of the muslins to help keep everything straight since the muslin fabric is all the same.
Hey June Cheyenne
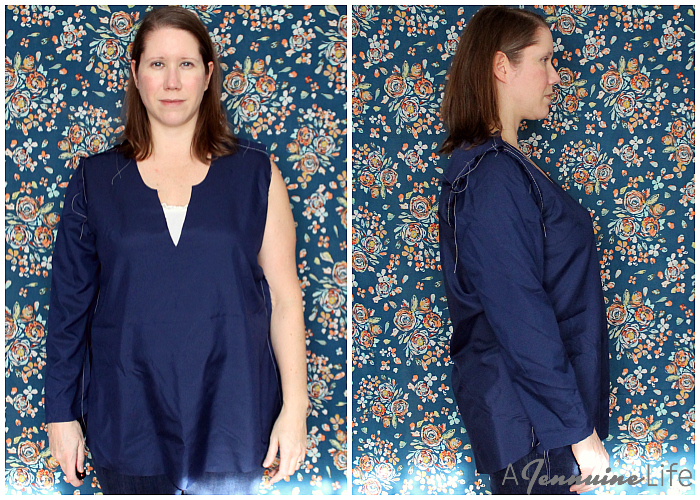
Muslin: Â The muslin for the Cheyenne looked pretty darn good for me right off the printer. Â It’s drafted for a D-cup and also has more than 7″ of ease across the bust so there’s plenty of room for movement and wearing ease. Â The shoulder seam ends nicely at the apex of my shoulder, so I don’t need a broad shoulder adjustment like I frequently do. Â The side view shows the shoulder seam directly below my ear, which is right where it needs to be. Â I am going to lengthen just an inch at the lengthen/shorten lines to give a little more coverage for wearing with leggings.
Itch to Stitch Mila
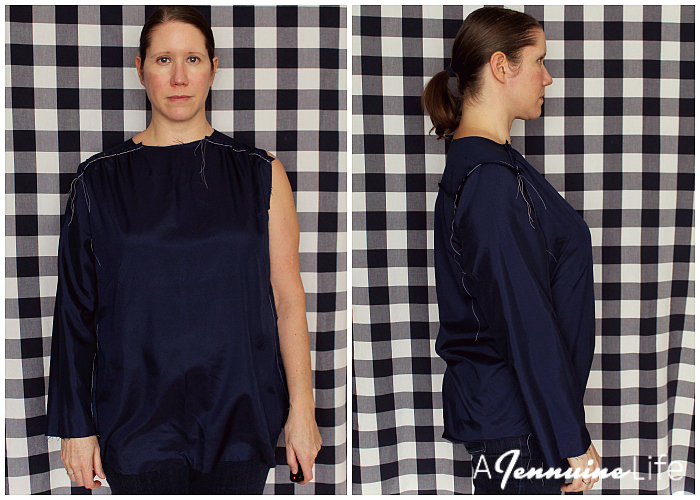
Muslin: The Mila has separate upper bodice fronts with cup sizes from A to DD.  With the cup sizing and rotated forward and gathered front shoulder, the Mila is very customizable for fit right at the pattern assembly stage.  No worrying about where the shoulder seam hits, so as long as the width of the shoulder was good and the sleeve fit to my desire there really isn’t anything aside from length to address, which wasn’t necessary.  Straight off the printer, my Mila was a perfect fit!
Liesl + Co. Gallery Tunic
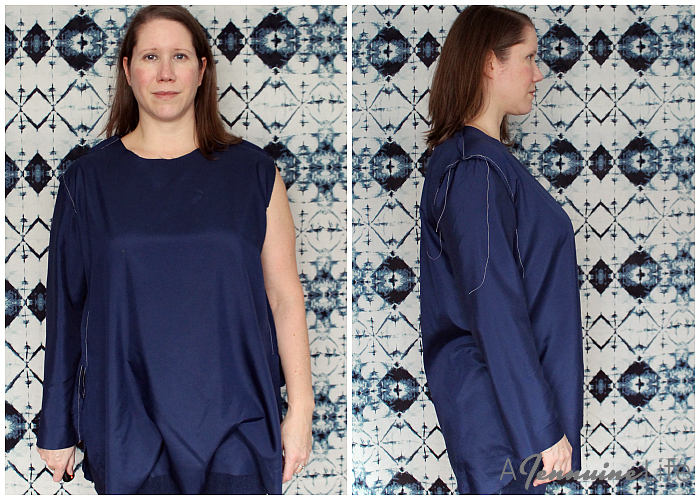
Muslin: First, I didn’t remember to pinch out the center front pleat that the Gallery has when I was taking photos. Â I did do that while I was evaluating my muslin, which told me I needed a full bust adjustment (FBA). Â That makes sense since the Gallery is drafted for a B-cup and I am a D-cup. Â I am however, a B sewing cup as measured by the 2″ difference between my upper and full bust measurements. Â So I made only a 1″ total FBA so I wasn’t over-correcting. Â I thought that was all I needed when I checked the muslin in the mirror, but after reviewing the photos I took I could clearly see that I needed a forward sloping shoulder adjustment: see how the shoulder seam sits well back from the top of my shoulder? Â That should be more or less straight down from my ear, which I couldn’t see when I looked in the mirror. Â When I compare the front and back pattern pieces, I was surprised to find that the front and back armscye are identical on the Gallery. Â Typically the back armscye would be a little longer than the front. Â So I made a 1″ adjustment for this. Â The tunic length looks plenty long for wearing with leggings.
Patterns for Pirates Everyday Elegance
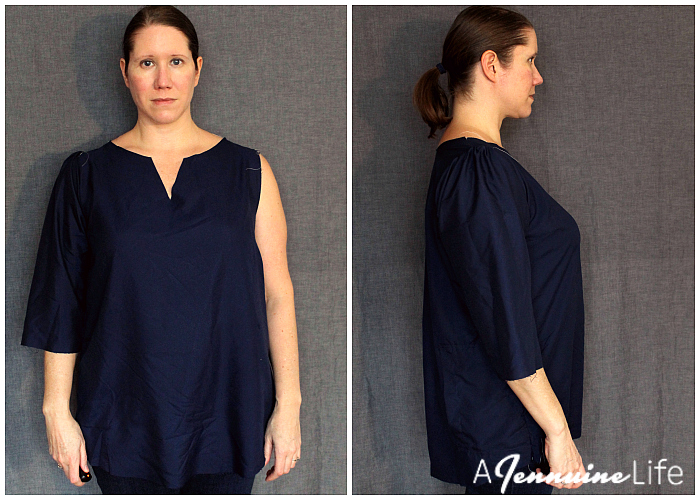
Muslin: I sewed up my muslin, and even before that I pretty much knew the tightly gathered sleeve cap wasn’t for me. Â There are notches for gathering, but no corresponding notches on the front and back armscye. Â That leaves you with pinning the outer edges inward to the beginning of the gathers and then gathering the cap to fit whatever’s left, which in this case was about 4″ of sleeve cap to 1.5″ of sleeve, resulting in a big puff at the edge of my already broad shoulder. Â Setting aside my dislike of the puffed sleeve, there was something funky going on at the front shoulder. Â I was getting excess fabric in front of my shoulder combined with pulling across the sleeve which was digging inwards.
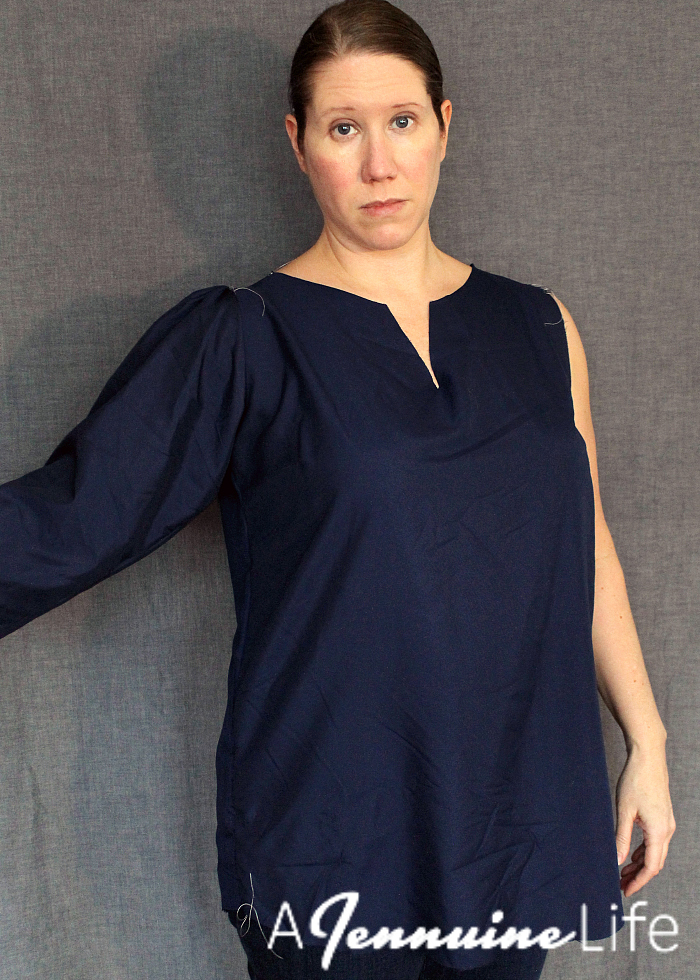
Sorry, my face kind of says it all – though that’s in part due to my camera’s remote focus having trouble with the sea of blue I was asking it to contend with.
Initially I thought the armscye must be too straight and made plans to adjust it. Â Since I had three other patterns and muslins already available, I did a quick check of the armscye against those patterns, and it was very similar. Â The difference was the sleeve. Â The Everyday Elegance has a very low and wide sleeve cap. Â Since the sleeve wasn’t tall enough to come up to the shoulder, it was pulling over fabric from the bodice front.
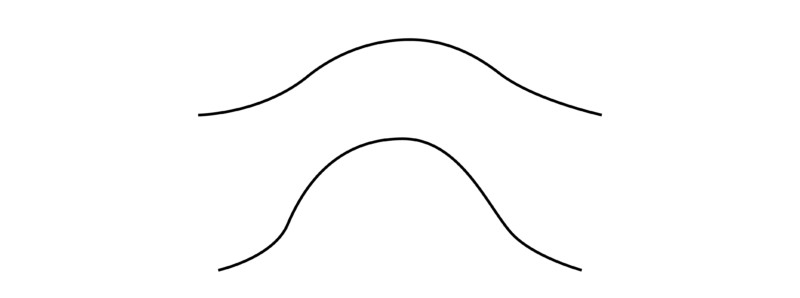
I drew a little sketch to show the difference in the shape of the sleeve cap – the Everyday Elegance on top and the Gallery Tunic on bottom. Â If you imagine taking those lines and forming a tube do you see how the Everyday elegance would have to draw upward to meet the shoulder and cause pulling? Â There needs to be more height for this garment. Â In a lightweight fabric with loads of drape this may be less apparent. Â I took a pause and thought maybe I should be planning a different fabric for this one, but I checked the fabric recommendations again and lightweight chambray is listed as well as two different modeled garments in chambray by the designer.
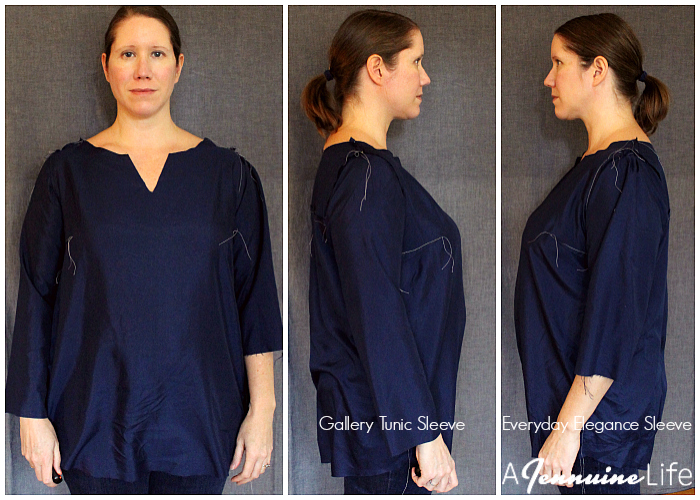
As I had already muslined my Gallery Tunic, I ripped the sleeve off and tried it on the Everyday Elegance bodice, and…  Aha!  Much better fit!  The more bell-shaped sleeve of the Gallery allowed the front bodice to fall where it was intended, including the bust dart, which was being distorted to point above my apex with the original Everyday Elegance sleeve.  I decided to make my final garment using the Gallery Tunic sleeve as I want to be able to wear my finished garment.
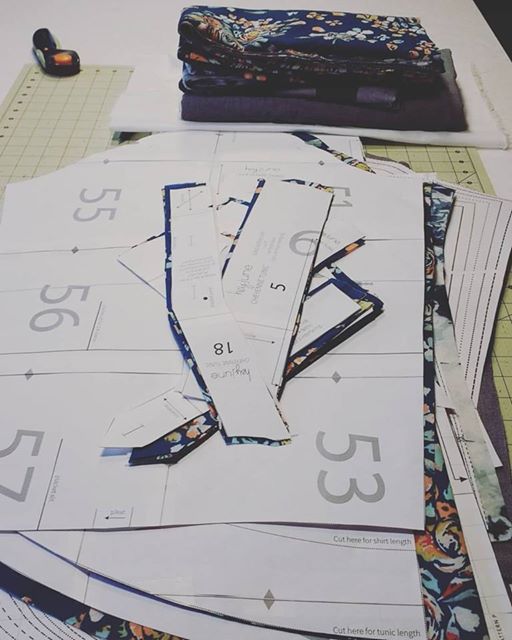
I’ve had a big cutting party and finished sewing the Hey June Cheyenne over a couple of days. Â I’ll share my review of that pattern and then each pattern in turn. Â Once I have all four sewn and photographed I’ll complete my full comparison post. Â I’m sharing snippets of my progress on Instagram, so come on over and follow if you’d like to see more.

Just fabulous! Can’t wait to see the rest.
Great comparison, looking forward to seeing the conclusion! I have a Big 4 pattern that’s a similar style I’m eager to try.
Off to a great start here, Jen. Can’t wait to see the finished products. I own everything here but the Gallery Tunic, although I have it on the possible to buy list. I was also going to do a comparison of Mila and Cheyenne, but then my testing commitments schedule and life got insane. I tested Blithe from WWD and that reminded me I should really do the other two.
Great comparison and very helpful to see how a sleeve cap fit matters. I can’t wait to see all the posts so I can decide which one is worth my pattern dollars.
Really detailed with accompanying photos. Great start with total of 4 “popover tunics” and your reviews forthcoming. Your sewing talents are certainly evident!
So interesting Jenn! Looking forward to reading more 🙂
wow! Thanks for all this work. I can’t wait to see the finished review.
So instructive…thanks! (Oh, and we’ll be twins once you’re done with your Cheyenne! http://skirtfixation.com/2016/04/two-blue-cheyenne-tunics/ Great minds…don’t you think?)
Thank you for such detailed reviews! Enjoyed reading your post!
It’s so interesting how individual fitting issues are. I have made the Gallery and the Cheyenne, both using the 34″ bust size. The Gallery fit perfectly right out of the envelope. The fit across the shoulders in the Cheyenne was really narrow–I did a broad shoulder adjustment and still find the sleeves dig in a bit under the arms when I raise them. Nothing major though and I still love it! I will be making multiple versions of both shirts in the future, and look forward to a dress-length version of the Cheyenne.
Great information THANK YOU