This is a sponsored post.
I was invited to participate in a promotional campaign from Jo-Ann Fabric and Craft Stores to introduce a new collaborative project with Jennifer Garner (yes, THAT Jennifer Garner) for a series of over 100 crafting kits targeted at kids aged 4 to 11. Â I immediately replied “yes!” because I love crafting with my kids.

The kit arrived in a great sturdy tote along with a gift card to Jo-Ann’s as a thank you for participating.
What was inside? Â Only the best kit they could have chosen for Arden and me to make together – a hoop hideout along with fabric dyes to transform it into something wonderful! Â The supplies are really nice quality and everything you need is included inside.
Each summer we tie dye as a family, so Arden is familiar with the process of tying things up with rubber bands and squirting the dyes on them. Â For this project, I wanted to try something a little different, so we did a pseudo Shibori technique to create this great window pane effect.
Here’s how:
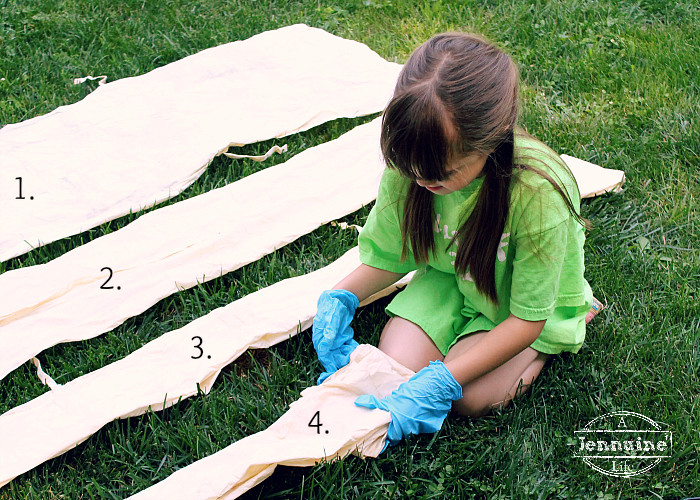
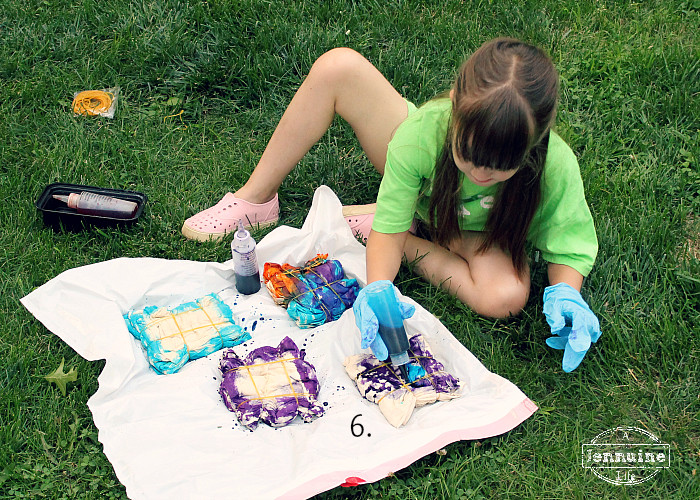
There are four muslin panels in the kit.  Prepare the panels by getting them all damp with warm water.  This prevents the dye from wicking into the parts that you don’t want to be colored.  The folding steps for a Shibori technique follow (gloves aren’t necessary for this part, but *someone* got excited about wearing them):
1. Â Lay the panels flat
2. Â Fold the long edges into the center
3. Â Fold in half lengthwise, but go the opposite way so it makes a “M” or “W” shape with the hemmed edges showing on one side. Â Tuck the ties inside.
4. Â Fold accordian-style going back and forth all the way down the length of the panels
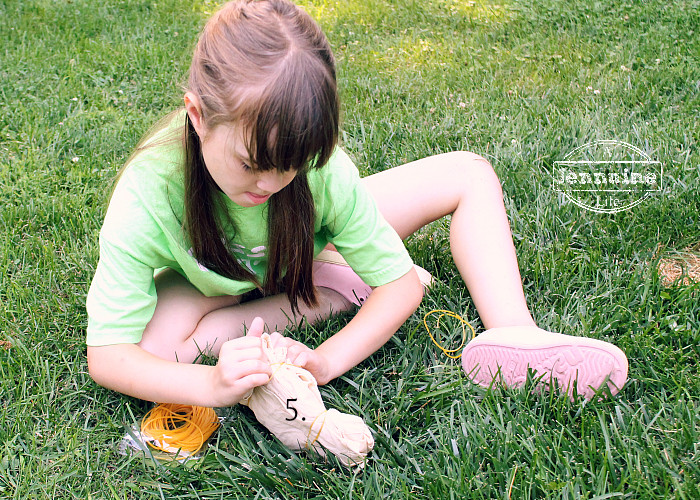
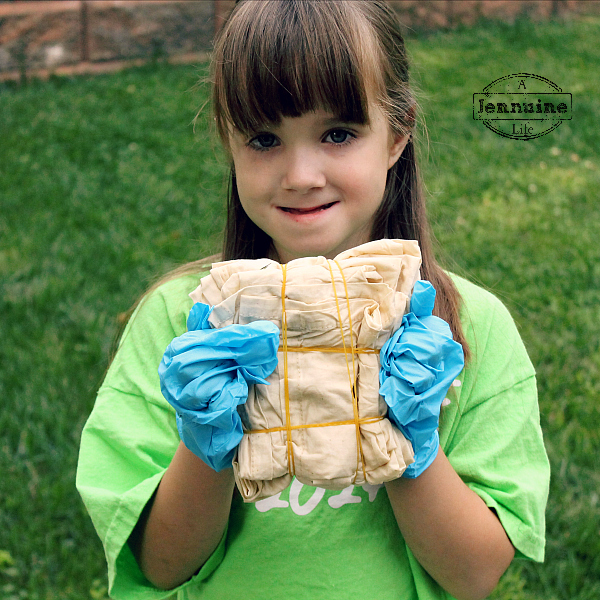
5. Â Keeping the square you made as flat as possible, tie the rubber bands around each edge, making a hashtag pattern.
Now is the time to get those gloves on, because it’s time to dye!
6. Â Using the included dyes mixed with water according to the instructions, squirt dye on the outer edges of the squares. Â In true Shibori, there would be boards on each flat side to help keep the dye from covering these surfaces, but it worked out just fine for our project to go without.
We had enough excess dye to make a spiral dyed shirt for Daddy, and probably could have also made several kid’s shirts if we had had any white shirts available to use.
Put the squares into bags or cover them well with plastic overnight to let the dye penetrate fully. Â Then wash them out in the sink to remove excess dye. Â I washed and dried these panels to be sure there was no residual dye and then gave them a quick iron before hanging them with Arden in her room.
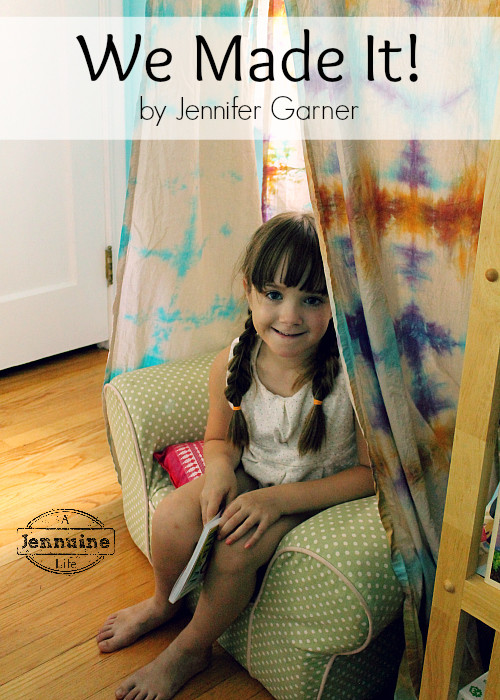
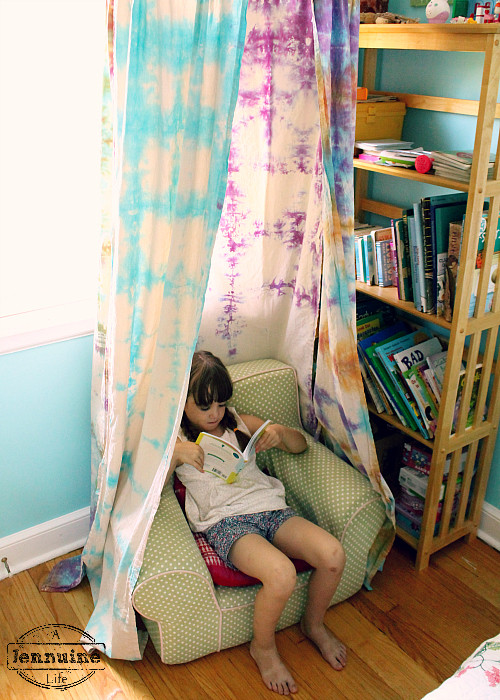
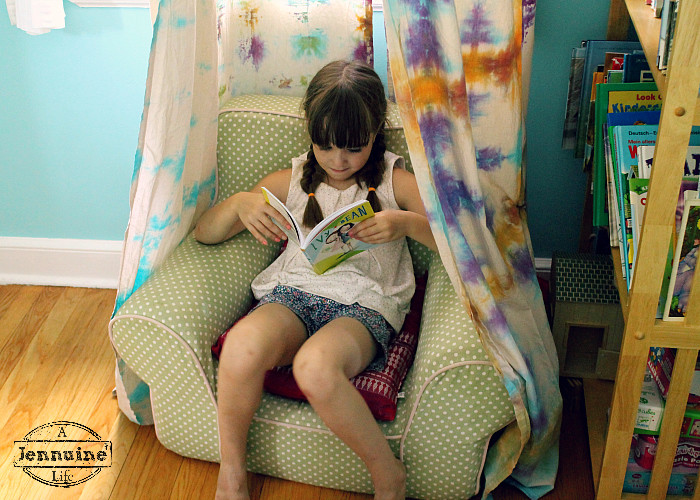
Arden LOVES her new hoop hideout! Â We placed it next to her bookshelf so that it surrounds her comfy reading chair. Â It’s the perfect little reading hideaway! Â You can see how the dye is concentrated on the edges of the folds making a cool square motif all over. Â The ones that Arden got all creative with the dyes on are really neat; blending and making great colors!
Part of this product launch is an Instagram sweepstakes which started June 21.  To enter, share photos, projects and advice about crafting with your family.  Tag the photos with #wemadeitsweepstakes and #joann to enter!
You can learn more about the products included in the line (they’re all awesome, btw!) by clicking this link:Â http://www.joann.com/kids-teachers/featured-brands-kids/we-made-it/
Thanks so much to Jo-Ann Fabric and Craft Stores for inviting me to participate. Â This was a great project that Arden and I thoroughly enjoyed working on together. Â I’ll be looking for more We Made It! by Jennifer Garner kits to complete together very soon!


That is so wonderful. You and Arden did a great job. Congrats on getting selected for a test run. You are AWESOME!!!
What a wonderful fun project for you to do together. Making memories is the best! Great job!
How cool! Love the kit and the finished project.