I outlined my lesson plans and Arden has already practiced the first four lessons. Â She is doing so great and is so excited to be sewing! Â She keeps talking about all the projects she is going to sew on her new machine.
Today I’ll share the first lesson: Setup and Safety
The machine:
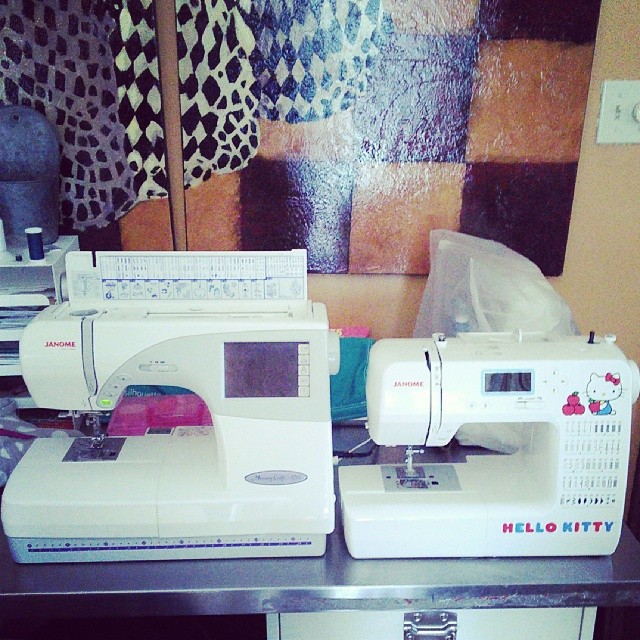
Firstly you’ll need a machine on which to learn and practice. Â It can be a full size machine, or there are many scaled down models available. Â I recommend spending as much as you are able to afford so you get a machine that will perform well and not create frustration. Â I sew on a Janome and that’s where my loyalty lies as I love my machine. Â It doesn’t hurt that Janome offers several Hello Kitty licensed character machines. Â I had planned to purchase this model, but when Jo-Ann had all Janome Hello Kitty models half off on Cyber Monday, I upgraded to the 18750 model. Â I have been very happy with the quality of this machine and how easy it has been to instruct Arden to use it.
I posted this to Instagram and it shows the side by side comparison of the size of the two machines.  The Hello Kitty model is billed as a full-size machine, but you can see that it is smaller than my Memory Craft.
The setup:
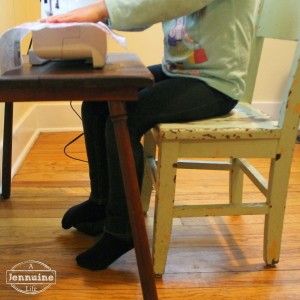
Just like you want your machine set up at a height which is comfortable for you, you need to think about how your child will operate the machine. Â If you set them at a regular height table and chair, they won’t be able to reach the foot pedal. Â This problem can be solved one of two ways: lower the machine, or raise the foot pedal.
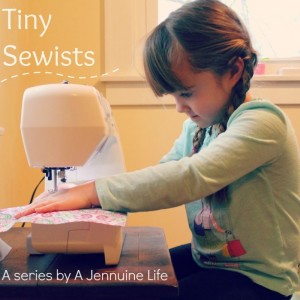
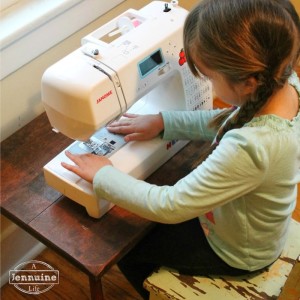
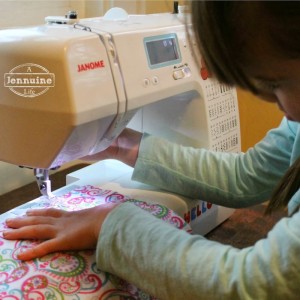
I used a small table which had been my Mother’s as a child and a child-size chair to allow Arden to easily reach the foot pedal and see her work. Â This table might even be a little low, but it’s better than the alternative. Â If you don’t have a table the appropriate height, you can use a footstool to raise the pedal to a comfortable height.
Safety:
Don’t skip this part! Â The last way you want to end your new sewists’ adventure is with an injury, right? Â Before we turned on the machine, I removed the needle. Â This allows you to show your child what the various buttons or dials do, and what the different parts of the machine are without risk of a puncture. Â As part of the first lesson we talked about the “danger zone” and keeping our fingers away from the throat plate as well as the path of the fabric directly in front of the needle. Â We also talked about how we need to stop sewing if we take our eyes off our work.
Know Your Machine:Â
We discussed the following points:
- where the power switch is
- the different stitches and what they’re used for
- major parts of the machine – foot pedal, bobbin spindle, thread spindle, thread uptake lever, presser foot lifter, needle (or where it would be), throat plate and feed dogs. Â I did not instruct her on how to thread the machine at this time.
- the “danger zone” or the area surrounding the needle and the path leading to the needle.
- how to lower and raise the presser foot
- starting and stopping the machine using the foot pedal.
Next up: Lesson 2



What a great idea to remove the needle and have a good ‘play’ while learning safety! My 3 y.o. is SUPER interested in sewing (monkey see, monkey do?). She knows she needs to put her foot on a pedal to make my machine work and she knows it needs to be switched on. I never taught her anything about it (other than it can be dangerous), so I unplug the cord every time the machine is not in use. I am getting excited reading how other sewists teach their kids to sew, so I am thinking we could give it a go as well. I have been looking for a vintage toy sewing machine for my daughter, something similar to what I had as a child, but I might actually go for a small but proper sewing machine she can use at school as well. Thank you!
Yay!! I’d love to hear how she does!
Jenn, any thoughts as to the appropriate age of the child should be? My middle child is turning 4 in a month… How old is your daughter?
Thanks!
Natalie
Good question! I think it depends on the child and their ability to take instruction as well as their manual dexterity and hand-eye coordination. Arden is four, will be five in March. I would say she is highly dexterous, and does a good job of paying attention. I think she could have handled it at an even younger age. Stay at the no needle stage until you’re comfortable that she’s ready to move on and you can’t go wrong!
I just purchased a Janome “Pink Lightning” for my 4-year old granddaughter. It is perfect…small, light weight, and has a needle guard to help protect her fingers. And, it has a slow, steady speed. She has been sewing on my lap for a year, so she is delighted with her own machine
What a perfect topic, and at just the right time for us!
I look forward to following along with my daughter.
Love that you are talking about safety first! Linking to you at sewistry tomorrow– http://www.sewistry.com/2014/01/teaching-kids-sew-tiny-sewist-series/
Thank you for this! I saw this on sewistry and had to check it out. My four year old has been asking about her own sewing machine….I think this series will help me teach her!
So neat to find your post. I bought my two kids (4 and 6) a sewing machine for Christmas since they have been asking for a while to sew on mine. Today I worked with my 4 year old (5 in June) and she did wonderfully. She got the basics of using the presser foot lever, hand wheel and foot controller. I am looking forward to seeing how else you teach her and projects you do.
I have been anxious to teach my granddaughter to sew but thought she was too young to use a machine but after your post I gave it a try and she loves. She wanted to thread the machine so we did that together and she threaded the needle! She has great fine motor skills. One problem I run into with her is with cutting paper or fabric. The fabric/paper just bends in the scissors…there us no cutting happening. This is an occasional thing but gets her frustrated. The scissors are sharp. Any ideas what she us doing wrong? Thanks for all the great tips on teaching.
Are you able to cut with the scissors? If they work for you, then it might be that she is twisting the scissors slightly, allowing the blades to not press against each other securely. If you think that’s happening, try showing her how to pull her thumb in or out as necessary to squeeze the scissors blades together. And paper and fabric scissors should be kept separate, as paper dulls the blade on fabric shears.
Get the scissors that you squeeze the straight handles together. You don’t have to angle the blades. They are especially good for people with arthritis and for lefties.
Jenn, I’d like to teach my daughter to sew, but she is only 3 years old.
She loves to sew and usually play on my sewing machine (which I leave without needle, to prevent accidents) .
How long must I wait to start teaching? What is the most appropriate age in your opinion?
I think it really depends on the child and their dexterity, focus and aptitude. Arden did amazingly well at four years old, but some children may not be ready until much older while others may be ready sooner. Sorry, I don’t think there’s really a set age to begin, just observe and use your best judgment. You can always step back to earlier skills if she gets hung up.
Jenn, my daughter is now 5 years old and she won a SINGER 242 from Grandma. I’m going to install the engine and pedal. Now I’m thinking how to limit speed to avoid accidents… LOL
Jenn, I think upgrading to the 18750 was a great move on your part — having a top loading bobbin and speed control would make it that much easier for a kid to learn how to thread & control the machine!
This topic is quite close to my heart because my early experiences with a sewing machine were on a toy & subsequently a mechanical, and ended up being a total fail as my peers and I in 7th grade Home Ec were struggling with sewing straight. Now with the new technology (especially speed control), it’s so much easier to pick up again & achieve better results with less frustration!
Hi. I really love how you have made this step by step or lesson by lesson. It has given me some direction with teaching myself and my daughter. I was wondering if I could copy, paste, and print to make it more accessible? Thank you
Sure thing as long as it’s for personal use. I should go through and make it a downloadable PDF for ease of use.
I really appreciate you allowing me to copy, past, and print. It is only for my personal use with my daughter and myself. Again, thank you 🙂
Btw, PDF would be awesome 🙂
This is really fantastic. I’m about to embark on some basic instruction for my daughter and her friend so this is a great resource! My girls are both 10, so we’ll probably go a bit faster but i love your lesson breakdowns. Id love to see any follow up sonce its teo years later. I found you via Pinterest. Cheers.
I do intend to continue with more lessons – both with Arden who is now 7 and Hadley who is about the same age now as Arden when she first began.
I love this! My 4 yr old asked Santa for a sewing machine for Christmas but she didn’t tell us until Christmas eve. He will be bringing a Hello Kitty one this year for sure (she loves hello kitty)! I promised her she could sew on my machine today and she’s already practiced with paper before. I have to go and get some of that tape though even for the older kids I teach for 4h, so many of them hate the pins. I just wanted to thank you for this because most people that here I let her sew think I’m crazy bit she loves it. So happy to see we’re not alone
Hi,
Thank you so much for doing this. I have to tell you I am using this for my son’s sewing portion of his 6th grade home economics class. You did a fantastic job and have fun projects; many he can use as gifts for family and friends when Christmas comes. The ruffled apron he will make for his little sister, make up bags for grandmas, PJ pants for cousins, and something for himself too. I may have him post when he is done, if I can remember, to let you know how it goes.
Regards,
Barbara
Thank you so much. I’m from Malaysia . I want to teach my kids use sewing machine and this article is very good for me to start our class. Thanks again.
Are you familiar with the Babylock Joy? I don’t know how it compares to the Janome you are speaking of, but seemed like a good option for a beginner?
Hi Jennifer,
I was actually looking for a sewing summer camp for my 10yo daughter. Came across your blog and am interested in following your course to teach her to sew. She does know how to operate my machine, however she doesn’t know anything about how to follow a pattern, different seams, or anything about actual sewing projects. So far she has just experimented on making doll clothes with scraps of cloth I’ve let her use as she likes. Are you teaching any kids online classes? and Do you have a pdf for your step by step lessons?
I’m not teaching kids online classes, and there is only a specific PDF for the Camper Cowl pattern listed in the Tiny Sewists series. It is a good idea to create a PDF lesson plan, I’ll see if I can work that into my list of projects. I can recommend the following projects that have PDF dowloads to advance her skills:
1. Camper Cowl – Free
2. Rancher Bandana – Free
3. Zenith Headband – Introduces sewing with knits
4. Plie Bag – Free with code in the Sew Jennuine Design Facebook group – introduces darts