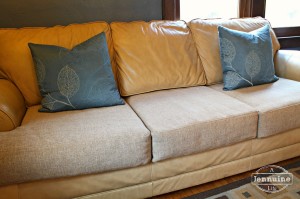
I just wrapped up a DIY upholstery project, making new covers for five cushions on my sofa and love seat. Â I took process photos to show how I made mine in hopes that something I learned might be helpful.
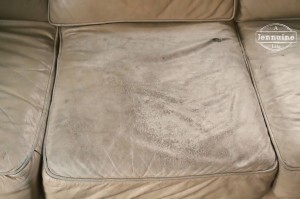
I bought a leather sofa and love seat back in my wild and crazy single days, using a particularly good annual bonus to buy them. Â They’re leather, and with a parade of dogs, cats, and now children using and abusing them for about twelve years, they’ve seen better days.
The center cushion of the sofa was in particularly bad shape with discoloration, thin spots, and a tear. Â We can swap the end cushions to the love seat which is used with much less frequency, but this cushion is sat upon pretty much every day. Â Since they’re leather the manufacturer didn’t wrap the leather all the way around to the backside, so none of the cushions can be reversed.
This project had been on my “to do” list for some time, but it a fairly casual manner. Â I’d browse through the home decor fabrics at Jo-Anne’s when I was there, and I did some looking online. Â There was always something that came up which took priority over this beast of a project. Â When hubby Dave volunteered his Mother to work on the project with me during their recent visit, it shoved rehabbing my sofas to the top of my list.
Materials:
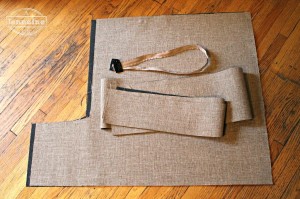
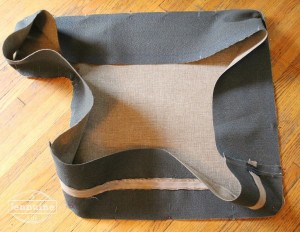
My Mother in law measured and made all the cuts. Â To do all five cushions on the t-style sofas we bought 9 yards of 54″ wide upholstery fabric and had about 1 yard extra fabric remaining. Â The cuts are made based on the old cushion dimensions with seam allowance added. Â We used 3/4″ seam allowances. Â For our cushions, we had two narrow strips which made up the zipper panel, then a main piece which wrapped all the way around the cushion. Â Then top and bottom pieces complete each cushion. Â We removed the zippers from the old cushions to re-use them.
Supplies:
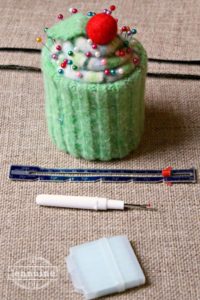
In addition to the normal sewing supplies, you’ll need plenty of pins, a seam gauge, a seam ripper, and some means of marking the fabric. Â Since the backing on my fabric was dark, I used blue tailor’s chalk. Â Not pictured are heavy duty sewing needles which are necessary to sew through the heavy upholstery fabric, especially where you may be sewing through up to five layers of material. Â I purchased nylon upholstery thread at the same store as the fabric.
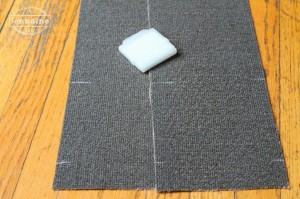
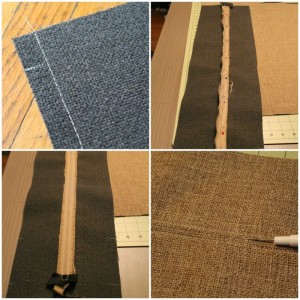
With the tailor’s chalk, we marked all the corners, as well as where the seam will be for attaching the zipper section to the full piece for the sides.
Zipper:
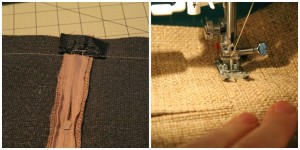
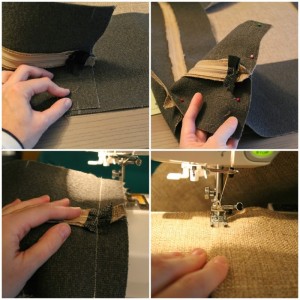
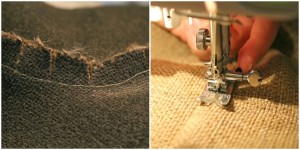
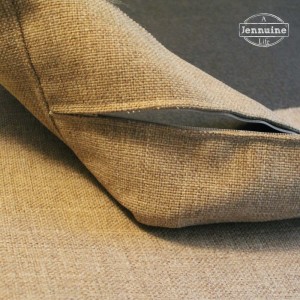
We re-used the zippers from the original cushions. Â Begin by sewing the two narrow pieces together. Â Start the seam with a normal stitch length and then switch to a basting stitch for the portion where the zipper will go. Â Switch back to a normal stitch length to finish. Â *Note, the normal stitch length is slightly longer than the default setting for heavier fabrics. Â I used 2.5 vs. 2.2 for this project. Â Using your fingers, open up the seam allowance and lay the zipper face down into the ditch where the stitching is. Â Pin in place with the head of the pin facing down so you can easily pull them as you sew. Â I find that with the heavy fabric I only needed to pin one side. Â Using a zipper foot, stitch about 1/4″ from the zipper down one side and then back up, sewing across the zipper at the bottom and top. Â Slide the pull past the zipper foot as needed to keep stitching straight. Â Once the zipper is installed, open the basting seam with a seam ripper.
Sew Side Seam:
With right sides together, sew one of the side seams to the zipper piece together at markings. Â Pull the seam allowance away from the zipper with your hands and stitch down about 5/8″ from the seam. Â I waited to attach the other seam to be sure everything lined up with pinning all the way around the cushion.
Pin:
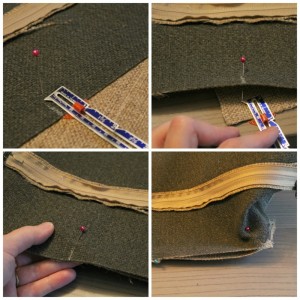
Using the seam gauge to guide the depth, pin the corners. Â You want to face this pin to the side you will sew to first, likely the right side for clockwise sewing. Â I find it easier to sew with the side fabric on top and the cushion on bottom. Â The corner pins will go in opposite of normal, with the head of the pin going to the inside of the fabric. Â Try to grab only a small amount of the fabric in the pin so it can rotate a little around the corner. Â Pin the next corner in a similar manner and then work the side material around the first corner and pin in between the two corners.
For the curve, pin up to it from both sides and then ease in the curve similar to setting in a sleeve. Â My Mother in law marked the curve on the backside so I made sure to put the pin through along the line. Â When sewing, I would aim for where the pin disappeared into the fabric along the curve.
Sew 2nd Side Seam:
Hopefully, if you’ve matched all your corners to your markings while pinning, you’ll come around and the marks for the side seam will also line up. Â If not, check and make sure you’ve pulled the material around the corners so they curve around without extra material. Â Leaving the pins in place except for the area around where you’ll be sewing, line up the marks and then sew with right sides together. Â This takes a little bit of wrangling and you’ll have to watch for pins, but it’s doable. Â After sewing the seam, pull the seam allowance away from the zipper with your hands and stitch down about 5/8″ from the seam as you did on the other side.
Pin the remaining section in place. Â Now wrangle the cushion into your sewing machine. Â I put a piece of washi tape on my machine at the desired seam allowance so I didn’t have to rely on being able to read the tiny markings on the needle plate.
Sewing Corners:
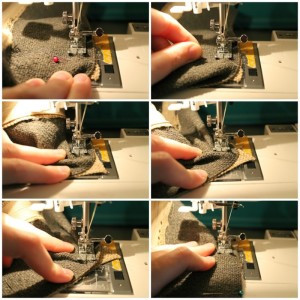
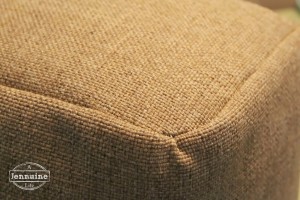
Sew up to the corner. Â Keep edges of fabric aligned as you approach, then as you near the edge, remove the pin. Â Turn the cushion 45 degrees and spread the fabric across this angle. Â The 45 degree angle is because you don’t really want a sharp corner on a sofa or it will get smooshed and wrinkly. Â Make sure to pull the fabric from the cushion sides toward the corner. Â As you sew across the 45 degree angle, work the extra side fabric under the needle to try to prevent puckers. Â When you reach the seam allowance at the far side, turn the rest of the way, move the extra fabric to the back and continue sewing.
Fit and Fix:
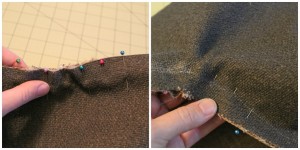
Despite my best efforts, I ended up with puckers on some corners. Â This was easy enough to fix by cutting the thread across the pucker and opening up the seam a little. Â I would then re-sew that 45 degree angle from the other side (cushion not side seam). Â I also almost invariably had to rip and re-sew the curved section to get it to match up with the line drawn on the reverse side.
Clip and Topstitch:
Once you’re satisfied with the fit and how the corners lay, clip the curve on the cushion side only, taking care not to get too close to the seam. Â You don’t need to trim any of the rest of the seam allowances. Â Then working from the top, stitch the seam allowance to the side seams, using your hands to pull the seam open as far as you can. Â My machine has a neat feature on the sewing foot where I can push the black button on the side and it will keep the foot level as you climb to go over multiple thicknesses. Â It keeps the needle from binding against the edge of the opening on the presser foot. Â If you don’t have this, just go slowly as you approach the area where the side seams attach to the zipper section and there will be five layers of fabric here.
Now repeat on the other side. Â Be sure to open the zipper before pinning, or you’ll have a hard time turning the cover right side out. Â This one is not as easy to check fit, but you can push the corners open to be sure they aren’t puckered or pointy without putting it on the cushion. Â Topstitching this side is also considerably more difficult, as you have to feed the fabric through inches at a time with the entire cushion in the machine. Â Trust me, if you take your time and have patience, you can do it.
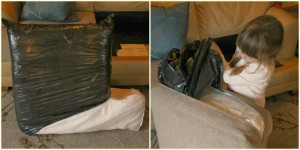
My Mother in law had a good trick for sliding the cover onto the cushion – use a plastic bag with the opening down. Â Slip the cover over and when everything is all in, pull the bag out through the zipper opening on the cushion. Â Zip together and stand back to admire your handiwork!
I hope this tutorial helps you with your project to take your sofa from drab and sad to shiny and fabulous!


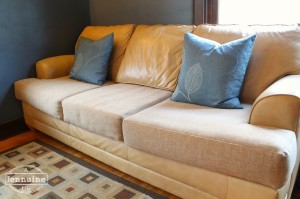
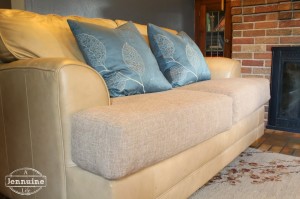


Nice job! This is another project I’d like to tackle, but frankly, I am scared to do this one. I need to keep great tutorials like this for encouragement!
Thanks so much! It really was doable, just quite the workout to pull all that fabric around.
It looks great! I have a couch that could use some love- but it would take some hardcore encouragement to make that project anywhere near the top of my list! I’m sure it feels awesome to be done 🙂
I guess I do work best with a deadline!
Looks great! This might be the kick in the pants I needed to finish recovering my glider before the baby gets here.
The new cushion covers look great!
Thanks so much! It really makes a difference in the room, and now I’m not embarrassed to have people over.
This was very helpful! Thank you for sharing.
Hey Jennifer, that was a job–really well done! I’ve been wanting to do the same thing and this is a great encouragement. I read an article from http://www.uratex.com.ph/industrial-institutional/diy-reupholster-sofa/ which explained easy steps in DIY upholstering but it did not have enough illustrations. Thank you for providing clear directions and images as well.
Where does your mother in law live …hahaha…
I have never attempted upholstery, so have to get the nerve to redo leather couch.