In
yesterday’s post I prattled on about how busy I am and how I’m looking forward to a good vacay with my family. I failed to mention that my harried activity level at least on the homefront is almost entirely my own fault. As a prime example of my self-flagellating ways is that I thought it was a good idea to throw my hat in the ring for Season 7 of Project Run & Play.
And what better entry to submit for consideration than the dress I posted about for my guest post as a
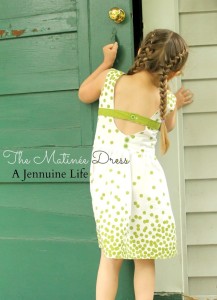
PR&P Sewing Friend: The Matinée Dress. It also seems fitting to bring that guest post home to A Jennuine Life, so without further delay, here it is!Hey Project Run & Play readers! I’m Jenn from
A Jennuine Life. I am
so. excited. to be joining you as a Sewing Friend – what an honor!
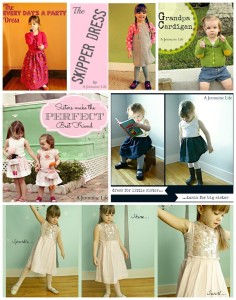
I have been avidly following along since the very first season. There is always so much talent displayed in the competition and great new blogs to follow. I had never sewn along with a season. When I decided to try out for a spot in Season 6 even though the timing couldn’t have been worse I made a deal with myself that I had to complete every challenge regardless. I didn’t make it into the competition, but I did satisfy my bargain and finished a look or
looks for each week:
And I had an absolute blast!
Today I’d like to share a project I made using the skills I built while sewing along with Project Run & Play, and then put to use when I did make it onto a sewing competition – Sew-vivor hosted by Rach at
Family Ever After. I used my Sparkle, Shine, Swirl dress I completed for the signature look challenge as my audition piece.
The first round for Sew-vivor was the
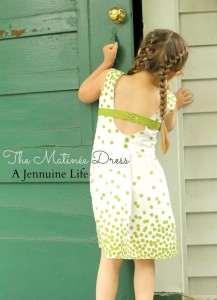
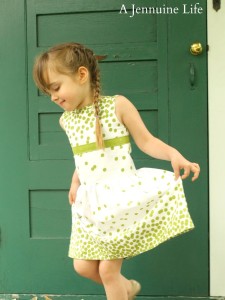
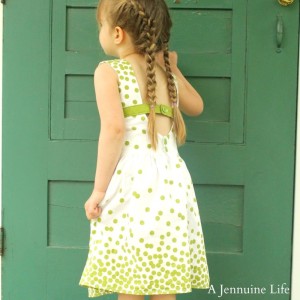
Emerald Challenge. I’d had this vision of a dress with a plunging back and sash at the empire waistline for a long time. I found this adorable green on white dotty ombre fabric from Moda’s Simply Color line by V and Co. but after sewing it I decided that it wasn’t “emerald” enough for the challenge.
You might have heard the term “wearable muslin” which means making your first draft dress out of fabric that you would actually wear instead of just cheap unbleached cotton. So that’s the approach I took for this dress and my “muslin” has gotten much more wear than the fancy “finished” version.
Wanna make your own? Here’s how:
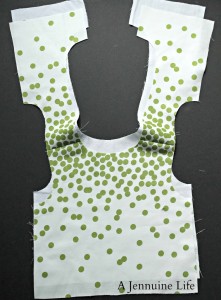
I drafted my bodice using a basic sloper I’ve used many times and know fits well. I adjusted the front neckline to bring it up higher to follow the line of her collarbone and the back with a gentle curve to about 3″ from the bottom back. I was shooting to have the sash about halfway between the neck and the waist and line up comfortably below the arms. Cut bodice front and back from main and lining fabrics.
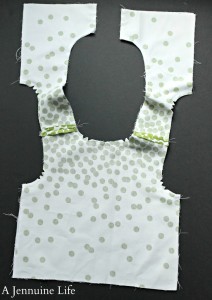
With right sides together (RST) sew at shoulders for both front and lining. Press seams open.
With RST, sew along neckline and arms. Be sure to leave the side and bottom seams open. If you prefer button loops, this would be the time to insert them into the seam at the lower back. I used buttonholes for this one. Clip curves, turn right sides out and press.
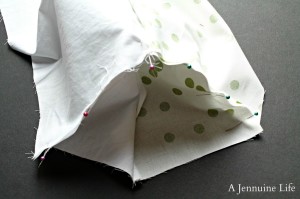
This is difficult to show in pictures, but with RST align the side seams outer front fabric to outer back fabric, and lining front to lining back. Be sure to match up the seam at the armpit. Repeat for the opposite side.
Finish the bottom edges in your preferred method. I used my serger (I call her Nina).
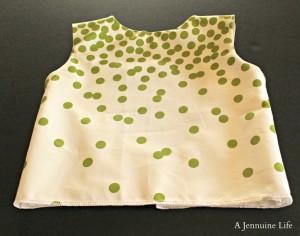
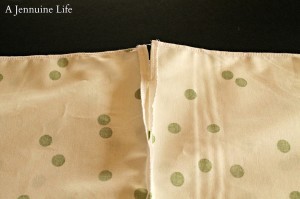
Cut your skirt pieces. For the dotty dress I had only purchased a yard of fabric, so I was able to squeak out two pieces about 2x the total bodice width x 14″. I cut one piece in half across the long edge and finished all the edges. Sew back pieces together with RST, leaving an inch or so open at the top to line up with the bodice back opening. Press and sew seam allowances down along the opening. Sew front to back with RST. Hem the bottom edge. As my skirt was only 14″ I had to do a narrow hem for this dress. Run two lines of basting stitches within the seam allowance to gather the skirt.
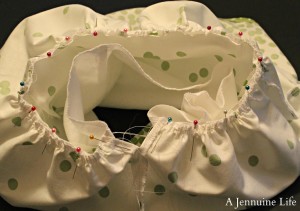
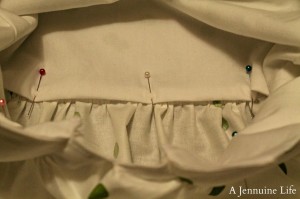
With RST match and pin back edges and side seams of the skirt and the bodice front. Pull the bobbin threads to gather the skirt until each section fits where pinned. Spread out the gathers until they’re even and then pin generously. Sew, remove pins and press.
Pinning from the inside, match up the lining bottom edge with the skirt bottom edge and then fold down the lining so it aligns with the stitching where the skirt is attached. Topstitch from the outside a scant 1/8″ above the waist seam.
I didn’t take pictures of the sash, but it was pretty straightforward. I wanted it very simple, so I just cut a rectangle about 3.5″ wide by a couple of inches longer than the chest measurement just below the arms. Sew together leaving an opening for turning along one long edge. Clip corners, turn and press. Pin in place along bodice using a ruler to get it nice and straight and stitch in place about 1/8″ from edge. Add buttonholes (and sewn button loops if you’re using those) and buttons.
There you are! I hope to sew along again in upcoming seasons – maybe without the set prerequisite to finish every one this time. If you haven’t sewn along and want to try, I wholeheartedly encourage you to do so! Not only did I make some really fun outfits, I’ve made some great friendships with other sew along-ers!
If you’d like to see more of my sewing, crafting, DIY (or whatever else I scheme up to try), come on over to A Jennuine Life for a visit and stay a while!



Love this and the fabric is too cute!
LOOOVE it! When I saw the back of the dress, mouth dropped.
I need to make this dress! So, one of the blogs I follow on Facebook asked everyone to go vote for her for the PR&P spot. When I got over there I saw your dress. I didn’t vote for her. I voted for you! I love the back so much!
Beautiful!