Orange Birdie Top
Skill Level – Confident beginner – intermediate
Items Needed
fabric for bands -Â 1/4 yard, I used denim
fabric for gathers and body - 1/3 yard, I used chambray
orange denim for birdie
4 buttons + 1 small black one for birdie’s eye
thread
rotary cutter
cutting mat/ruler
sewing machine
iron
Dimensions given are for a 2T top. Adjust measurements and fabric requirements accordingly to get desired size. Sew with a 1/2″ seam allowance; keeping the same allowance throughout the project unless stated otherwise.
1. Cut your pieces. Sorry, no picture for this. I’m not one of those people who plans out a design with dimensions at the beginning of a project. I usually start with a waist or chest measurement, or make a pattern from an existing piece of clothing. In this case I began with the measurement for the chest and figured out the dimensions as I went.
From the denim:Â straps – 2 pieces 3″ x 11 1/2″Â top band – 3″ x 27″Â middle band – 2 pieces 2″ x 27″Â bottom band – 3″ x 33″
From the chambray:Â gathered piece – 3″ x 45″Â body 8″ x 33″
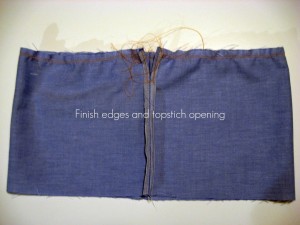
2. Sew body right sides together (RST). But stop about 1 1/2″ from the top edge. Finish the edges using a serger, zig-zag, or overcast stitch. Press seams open and topstitch the opening from the right side sewing about 1/8″ from the edge starting at the raw edge, across the bottom and back up the other side.
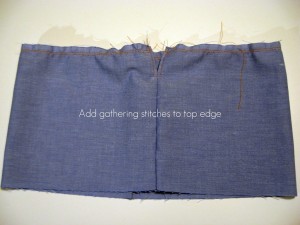
Add gathering stitches. Sew two parallel basting stitches close to the raw edge.
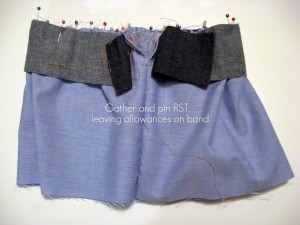
Pin the middle band. Leave a 1/2″ overhang on the left side, and a 3″ overhang on the right side. This extra fabric will form the tabs for the buttons. Line up the center of the band and the body fabric and pull the bobbin threads to gather. Distribute the gathers evenly. Sew.
This is the part where I stopped taking pictures for a bit. I’ll do my best to describe what I did.
Finish short edges of the piece to be gathered. Serge, zig-zag, or overcast the raw edge.
Sew gathering stitches. Along both long edges of the piece.
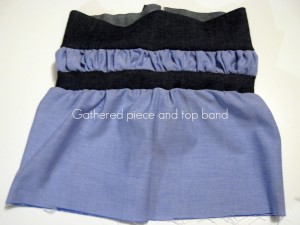
Pin the gathered band. With RST to the top of the bottom band and to the top band piece. Line up the finished edge of the gathered piece with the same 1/2″ and 3″ overhang on both edges. Line up the center of the band and the gathered band fabric and pull the bobbin threads to gather. Distribute the gathers evenly. Sew. Press seams toward the denim bands. Finish raw edges.
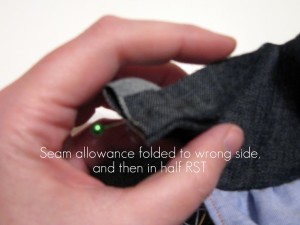
Finish top band. Fold the 1/2″ seam allowand to the wrong side on both edges, and then fold in half with RST. Stitch 1/2″ from the short edges, backstitching at the beginning and end to secure the seam. Trim the seam allowances and clip the corners.
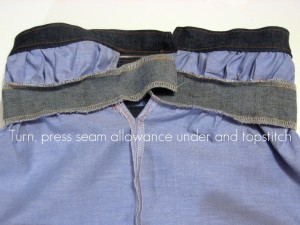
Turn and press.  the inside edge under 1/2″. Pin in place so the pressed edge covers the line of stitching from attaching the gathered piece to the top band. Topstitch the top band around all sides about 1/8″ from the edge, enclosing the top edge of the gathered piece.
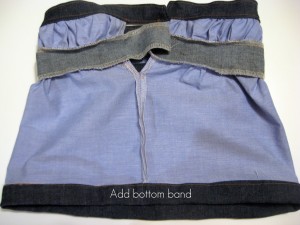
Add bottom band. Sew short edge of band RST. Press seam open. With RST and raw edges aligned, sew the bottom band to the body. Press seam allowance towards the denim. Press 1/2″ under on the raw edge of the denim, and then press the piece in half. Pin in place so the pressed edge covers the line of stitching from attaching the bottom band to the body. Topstitch about 1/8″ from the edge from the right side, enclosing the raw edges.
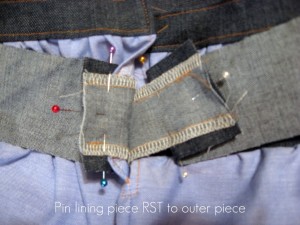
Finish middle band. Pin the second piece cut for the middle band RST to the piece already sewn on the top.
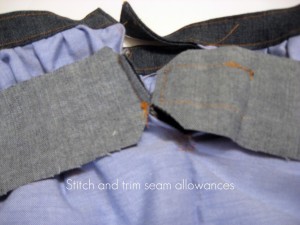
Stitch and trim seam allowances. One the short side, stitch 1/2″ from the edge. On the longer side, stitch 1/2″ from the edges extending beyond the opening. Trim seam allowances and clip corners. Turn the piece right-side out and press 1/2″ under on both long sides. Pin in place so the pressed edges cover the lines of stitching from attaching the gathered piece and the body to the middle band. Topstitch from the front around all sides about 1/8″ from the edge, enclosing the raw edges.
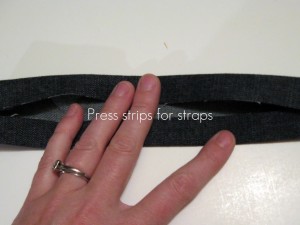
Press strips for straps. Press the strips in half lenthwise WST. Open the piece, and then press the raw edges to the pressed line.
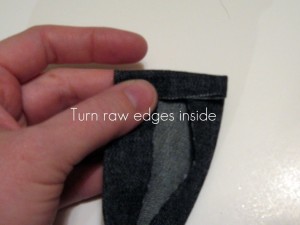
Stitch straps. Turn the raw edges on the short sides in 1/2″ and then close and pin the strap. Topstitch 1/8″ from all edges.
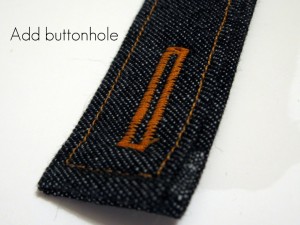
Add buttonholes. To one end of each strap, and to the ends of each tab on the bands. Open the buttonhole using a seam ripper or scissors, putting a pin across the end to keep from cutting the hole too large.
Sew on straps.  Mine were placed about 2 1/2″ from the outside edges when the shirt was laid out flat. Pin the straps in place on the inside of the back of the shirt and then stitch along the existing lines of topstitching from the outside.
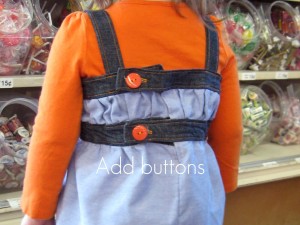
Add buttons. To front of top band and back of top and middle band to correspond to the buttonholes.
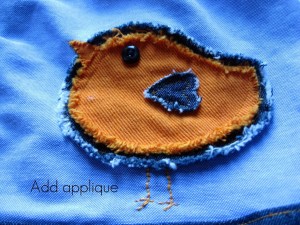
Applique. I drew my birdie freehand. I cut one piece from the denim, and then cut another about 1/4″ smaller from the orange denim. I sewed the larger piece to the top, then the orange piece on top. The wings are a little heart shape out of the denim – sew that on top of the birdie. The beak is a little triange of the orange denim, but I used a zig-zag stitch to attach that so it wouldn’t fray. Add a small black button for the eye. I waited until after I laundered the piece to add the hand embroidery for the feet – freehanded using two strands of embroidery floss.
This will be linked up with Shwin&Shwin and also to the parties in my linky party directory and to:




That is super cute! Wow… Thanks so much for linking up to It’s Stinkin’ Cute Craft Thursday!
Thanks for linking this up! I loved your entry! It was just too cute!
Oh Gosh this is so cute! Fantastic job! Thanks for the tutorial!
Super cute! Thanks for sharing!